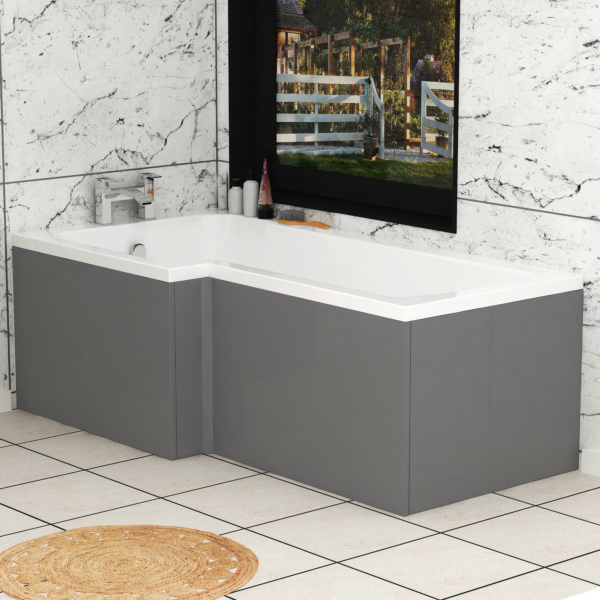
Ever noticed where all the ugly plumbing and pipework of your bathtub go? The messy under-tub plumbing is hidden by MDF bath panels, creating an overall refined look of the room. Unless you incorporate a royal appeal with a freestanding bath, every l shaped bathtub will require L shaped bath panel, every modern bathroom suite needs bath paneling to appear immaculate.
Besides maximizing the appearance of your bathroom, these dedicated bathtub boards protect the internal water lines and other vital fittings and fixtures. Though bathtub panels come in various materials, styles, and finishes, MDF panels are the most popular of the lot.
Apart from fortifying your bathtub, MDF panels incorporate a finished gleaming look in the bathroom. Not to mention, they are seamlessly easy to install.
What is an MDF Bathtub Panel?
Like plywood, MDF is a wood product often manufactured as a byproduct of industrial milling. It also includes a rich essence of resin and wax that imparts flexibility and sturdiness to the wooden board. Contrary to standard wood panels, the MDF sheets are designed to sustain intense pressure and heat, making them more durable.
In terms of bath paneling, MDF Bath Panel sheets are preferable to typical wood for multiple reasons. They reinforce the lower underside of the bath, which will protect that provide protection to the underside of the bathtub and floor and the pipework. It also hides the pipework helping you to create a uniform look.
How Many Panels Does a Bathtub Require?
The number of panels you require to install against a bathtub depends on the fitting of the tub. A tub that exhibits three sides into the room will require 3 MDF bathtub panels to surround. In the case of an alcove tub, it can suffice with a single tub. Let’s learn more about the type of tubs requiring an MDF Bath Panel.
Corner Baths – There are no set parameters for a corner bath regarding the paneling. Even though they are set in corners, they can have a curvy or edgy outer end. Either way, corner baths will require you to hide two sides of the plumbing underneath.
Shower Baths – With one slightly wider, shower baths require more than two panels to cover the extra width. You will also need to determine whether the wider end is curvy or have straight edges.
Straight Baths – As one of the most commonly installed bathtubs, straight baths offer no hassle when it comes to installing MDF panels. However, it depends on the tub’s positioning to determine the number of panels a bathtub needs. A straight bath will require two panels for opposite edges when set into a corner. But if it is positioned between two parallel walls, you only need a single sheet of MDF bathtub panel to close the outer end.
you would not a bath panel n case you choose a freestanding bathtub.
How to Install MDF Bathtub Panels – All Steps Explained:
Before you start, make sure you have the following equipment at your disposal:
- Automatic drill/cutter
- Adhesive Sealant
- Measuring Taps
- Pliers
- Screwdrivers
- Brackets
- Wooden plinth
Once you get the necessary tools and equipment ready, it’s time to fix the MDF Bath Panel outside your bathtub.
Step 1: Start by measuring the height of the bathtub from the floor. Place one end of the tape measure on the floor and stretch it up to the tub’s rim. This measurement will help you determine what size of MDF bathtub panels you need.
Step 2: A straight bathtub placed in a corner will have two opposite sides exposed to the room. Instead of mounting both sides separately, install a separate plinth inside to construct a single L-shaped piece. Here you can use softwood planks or battens to fix the two sides.
Step 3: Once the L-shaped structure is ready, make small cutouts on the MDF board on the side of the wall to make room for plumbing lines or skirting boards. Ensure that the sides of the board are enameled with a PVA mixture for waterproofing.
Step 4: Place the structure against the wall to see if its fits properly. Now fit a piece of plinth inside that will act as a supporting batten for the panels.
Step 5: Install the panels with the bathtub and wall using screws. Don’t forget to use sealant to bind the edges. Also, use a leveling gauge to ensure the attached panels are precisely vertical.
Final Thoughts:
You see installing an MDF bath panel on your own is not that hard. But if you have never handled any such job in the past then it is recommended that you let it on professional. After all, they are the ones who are going to fit your bathtub as well. However, if you decide to DIY then make sure that you have access to every piece of equipment listed and carefully follow the step-by-step instructions that we have provided in this article. You must try to complete it in a hurry as handling MDF material can be a bit tricky in comparison to installing an acrylic bathtub panel.


