
How to Draw a Microscope. Scientists and researchers use many tools and gadgets to conduct their research. Some of these tools can be purchased in our homes, and the microscope is one such tool. Using a microscope can be fun because it allows us to access a whole new world that cannot be seen with the naked eye. With one, everyday objects take on a whole new dimension, and learning to draw a microscope can also be just as fun.
You’ve come to the right place if you want to know how it’s done! At the end of this tutorial, you can draw your microscope layout. You can draw many more characters like bow and arrow drawing, Anubis drawing, betta fish drawing, cobra drawing, blueberry drawing, coconut drawing and many more Halloween drawings.
Drawing a Microscope
Step 1:
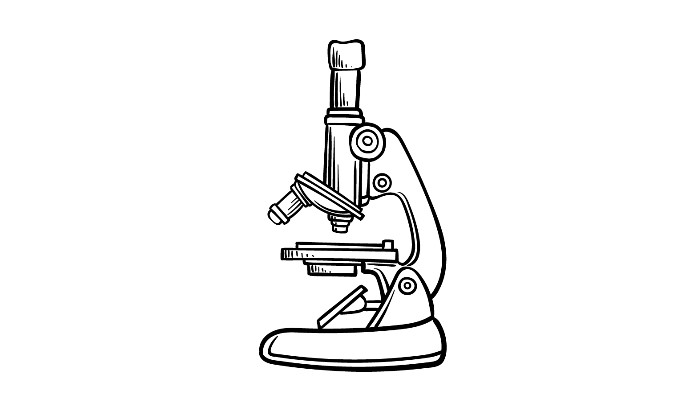
In this first step of our guide on how to draw a microscope, we will start with the top of the microscope. It means that we will start with the eyepiece of the instrument. You can first draw a small, slightly rounded square shape to create the eyepiece. Then extend two straight lines from this shape to extend the eyepiece.
You can then add two small, skinny rectangular shapes underneath for the base of the eyepiece. Finally, for this step, we’ll draw several circles inside each other near the base of the eyepiece. This part will be one of the sections used for display adjustment.
Step 2:
A microscope wouldn’t be handy without some lenses, so we’ll add some to your microscope drawing in this step. First, add a few more straight lines from the top of the microscope. Once you’ve drawn them in, you’re ready to remove the compartment that houses the microscope lenses. First, draw a few thin diagonal shapes next to each other in the same position as they appear in the reference image.
Then use a rounded line connected to these skinny shapes. The next thing we’ll draw is the lenses, which will look like thin rectangles with round sections at the end. Complete this step by drawing a curved line on the right side of the microscope.
Step 3:
We’re going to make the microscope arm bigger in this third step of our guide on how to draw a microscope. Extend a curved line down from the top of the adjustment knob at the top of the microscope that you drew in a previous step.
Once you’ve outlined the arm as it appears in the reference image, we can add the microscope stage. It is where you cut out the slides containing the substance or object you want to see. As our example shows, you can draw them using several thin rectangular shapes that connect.
Step 4:
This step of drawing your microscope will allow you to complete the outline of the rest of the microscope. First, draw a rounded shape under the microscope arm and stage. This body will even have some little rings. Next, we’ll draw a small mirror on a hinge, which will act as the light source for the microscope.
Draw a small rectangular shape, then glue a thin rectangular shape to it. Finally, finish with another rounded shape for the base of the microscope. That’s all there is to this step, and we’ll focus on a few final details next.
Step 5:
You are now ready to add the details and final touches to your drawing in this step of our guide to drawing a microscope. To do this, we will add various straight and curved details to each microscope section. It will help give the multiple components more texture and depth. When you’ve added those details, it’s up to you to take control and add your stuff!
You can draw a background to show what other science equipment you’d like to use with this microscope or maybe even draw objects you’d like to see underneath. These are only a few pictures, but what else would you want to count?
Step 6:
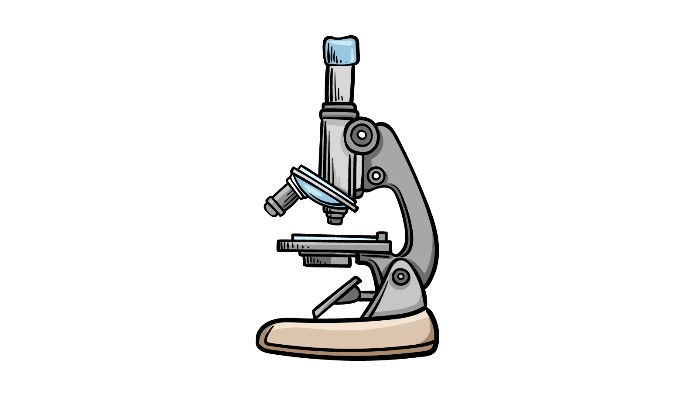
It is the last step of your microscope drawing, and we’ll finish it with color. Microscopes don’t usually have such vibrant colors, and we reflect that in our example image by using lighter grays and blues to color it. You can opt for a clinically similar color scheme, but you should also feel free to change the colors however you like!
Five tips to make your microscope drawing even better!
Let’s look at how we can improve your microscope sketch with these 5 tips! One way to make this drawing of a microscope educational and engaging would be to add labels. Microscopes have many parts that have names, and you can find them by searching for a schematic online. It could be as simple as drawing a line from each piece and adding the title. You could then show what is examined with this microscope. One way would be to draw a line from the glass base of the microscope.
It could be attached to a circle showing an enlarged view of what is being looked at through this microscope. What are the things you would like to see with this microscope? A microscope is one of many tools that scientists and science enthusiasts like to use. To make this drawing more complete, you can add a few more tools you would see in a lab environment. It could include beakers, slides for use in the microscope, and perhaps the box in which this microscope would be transported. Something more significant, like a telescope, would look good too!
Once you’ve added more gear, you can add a background to complete the scene. This lab setup could be achieved with the equipment we mentioned above. Or, it could show that this microscope is being used in a simple home environment. That’s up to you, and it might indicate where you’d like to use this microscope if you own it. The last suggestion we would have would be to add a character to your microscope sketch. It would be a way to show who uses the microscope! One of the most straightforward ideas would be to use yourself as a role model. Or, you can draw a scientist character or any other person in whatever style suits you best.
Your microscope drawing is complete!
With these final details and colors added, you’ve completed this guide on how to draw a microscope! This guide has been designed to break down the various components of the microscope for easy navigation. We hope we have achieved this goal so that you can focus on having fun drawing! Once you’ve finished this image, don’t forget to spice it up by adding great details, elements, and color options.
We will be very curious to see what you choose to do to add your touch to this image! More good news: we have many more great drawing guides for you to check out on our website! Please keep checking back, as we often upload new ones. We’d love to see how your microscope drawing turned out, so be sure to share it on our Facebook and Pinterest pages!
Also Read: How to Draw Ron Weasley